
Fluency Direct allows you to create commands to make your speech recognition and dictation smoother and easier to use.
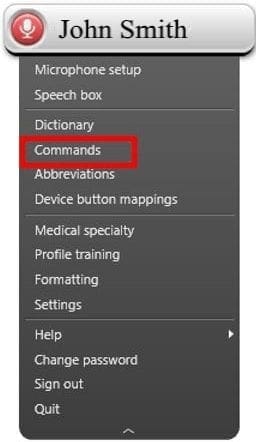
To create a new command, click on the Fluency Bar and select Commands.
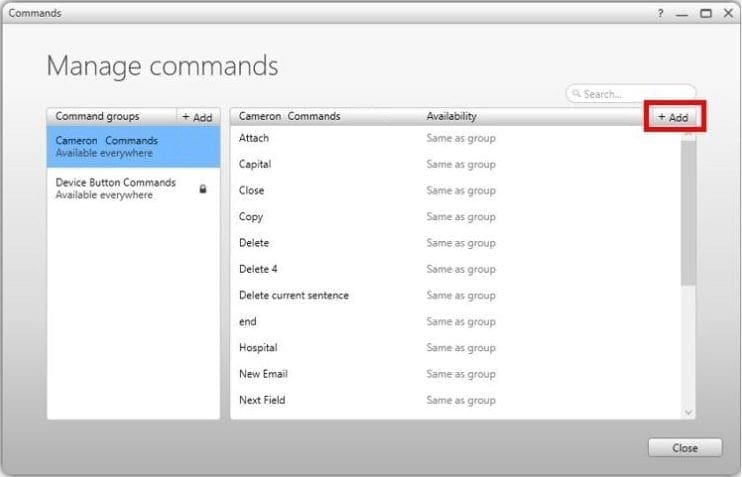
The Command Center window will appear. Click on Add to open the command console.
Below are just a few examples of commands you will see.
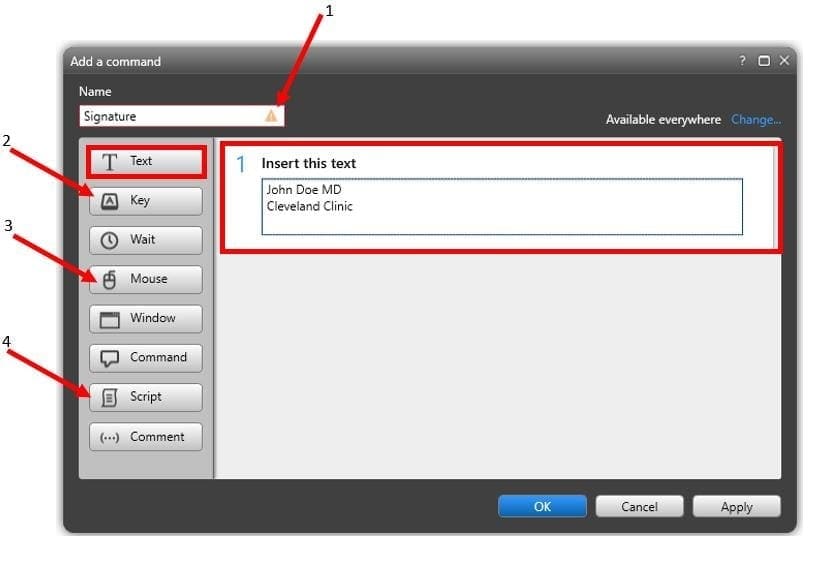
- Name Field – This is what you will verbalize when you use the command. If you notice an orange warning triangle, this means you already have a command named ‘Signature.’
- Key – These are the hotkeys you can set for commands. For example, you could name the command ‘Open New Document’ to open a new document press a keyboard shortcut for the command.
- Mouse – This is used to move the mouse to a specific location on the screen. You can use a Mouse command to close a word document, for example.
- Script – You will also be able to insert your own custom scripts into the software. If you have a previously created script, copy and paste it into the text field.
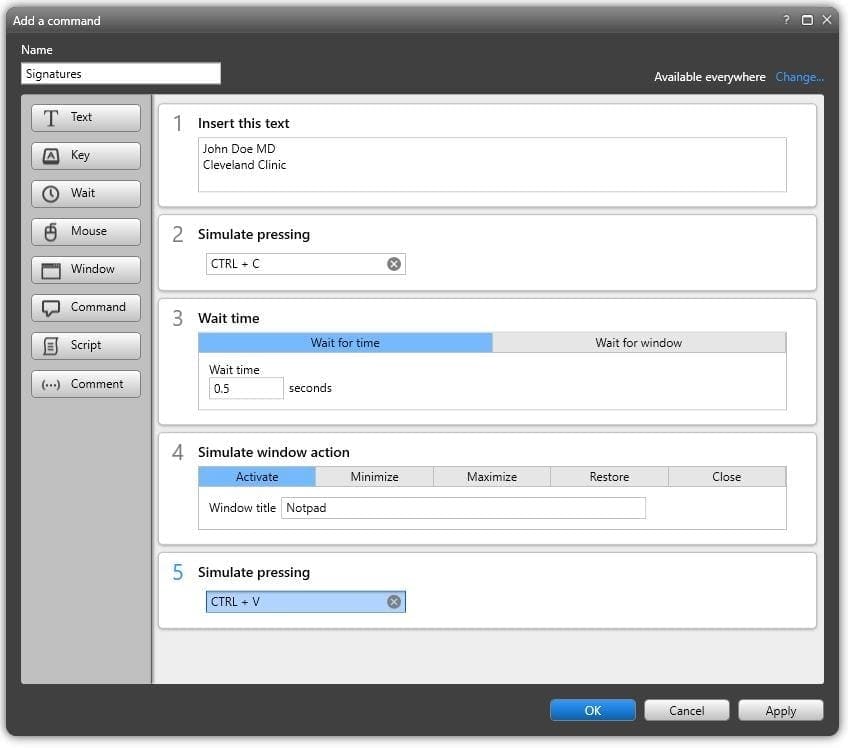
Another powerful tool you can do with Fluency is to link multiple commands. If you want a command that can do more than just inserting a signature, you can have multiple aspects to one command. For example, you can create an efficient command to insert your ‘Signature’ and then have the mouse close out of a window.
Making use of these commands is a great way to reduce your dictation and transcription time. If you would like to know more about the other command sets in the software, please feel free to reach out to us!
Visit our friends over at TranscriptionGear to get the rest of what you need! From headsets to foot pedals, they have you covered.


